Wednesday, November 21, 2018

Easy Brick Oven Firing

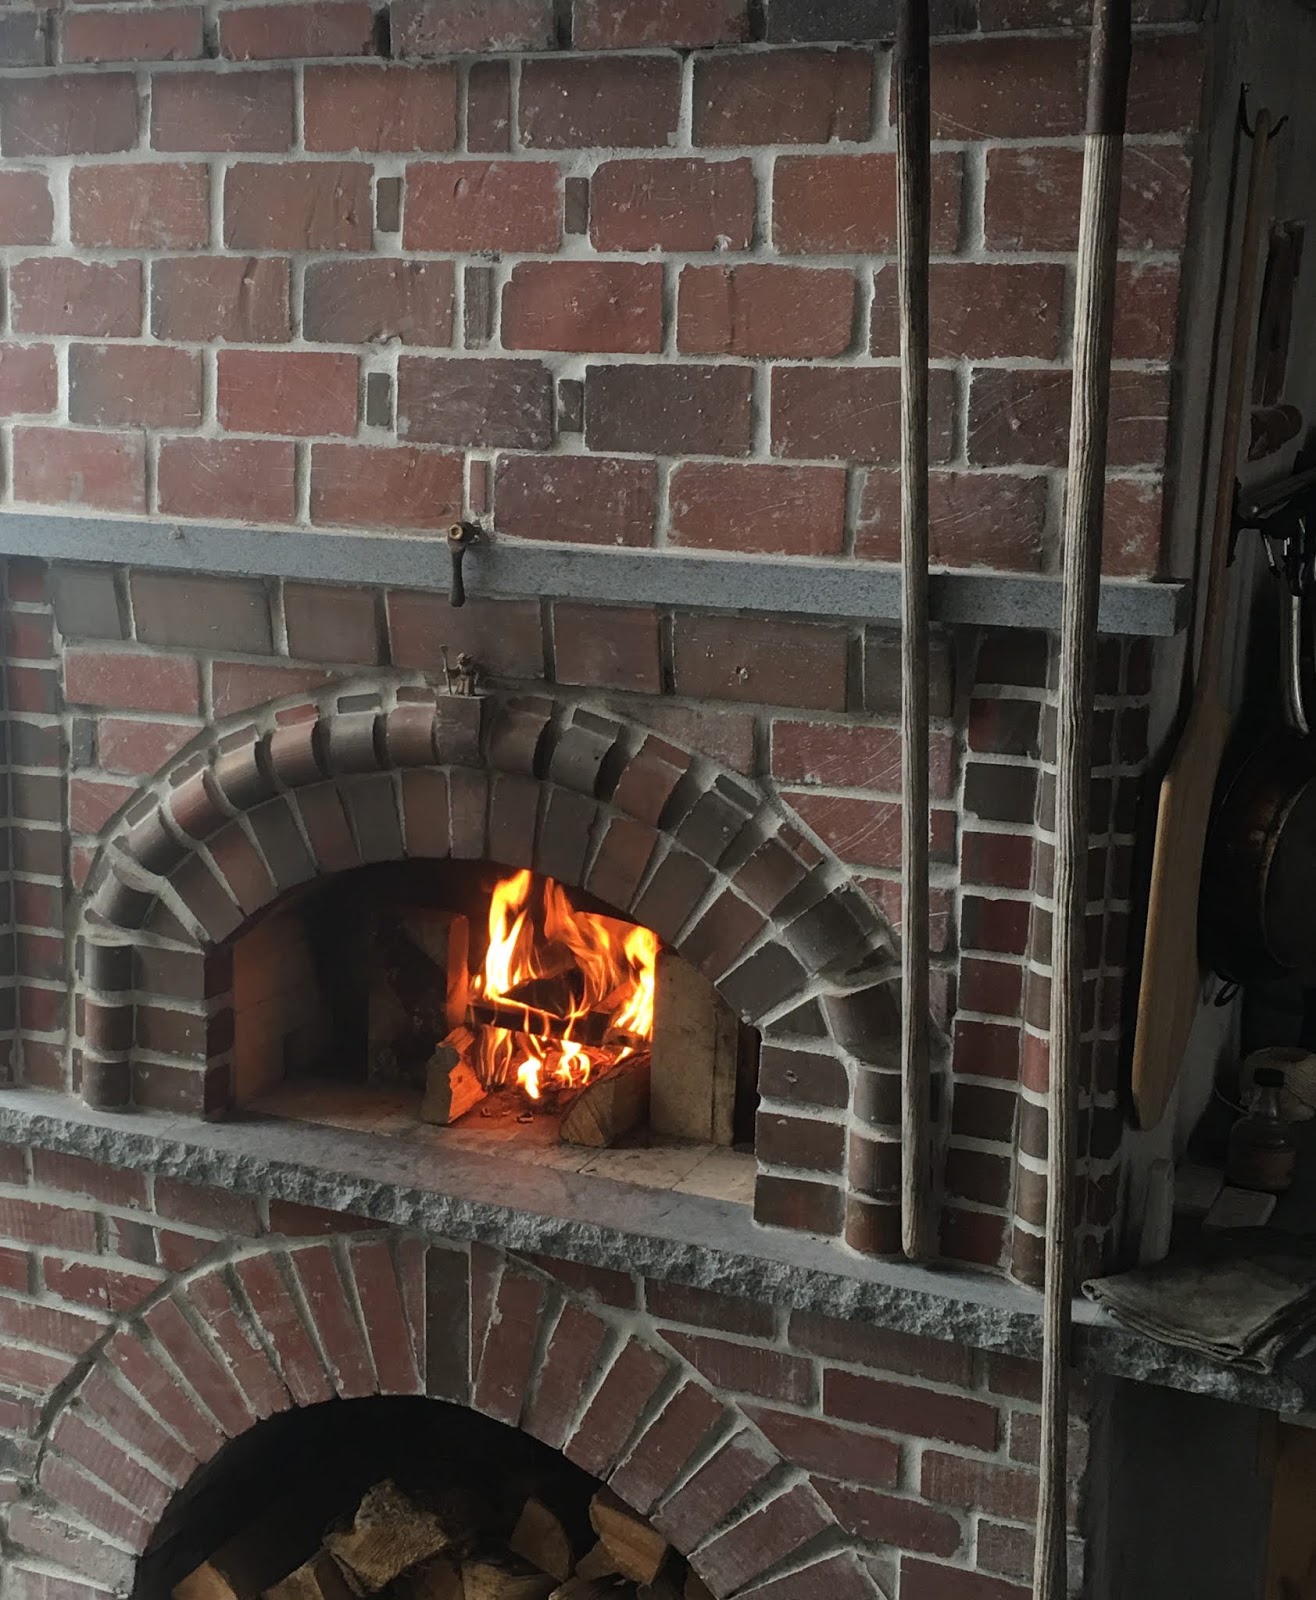
The initial fire is built under the flue.  Two 'rail logs'
let you put kindling and small firewood that will 
catch quickly and make coals.
One of the biggest concerns that potential brick oven users bring up is the length and difficulty of getting the oven to 'temperature'.

Although, it is not as hands-free or fast as a conventional gas or electric oven, it should be easy, relaxed and efficient.  Here's how:


  • Dry firewood: Wet or poorly seasoned wood requires that the fire first dry it out, then burn it.
  • Good draft: A properly built oven chimney will draw the smoke and flue gases well.
  • Relax: You are not stoking a locomotive train climbing the Rockies. Don't overstoke.
The following photos demonstrate how I fired my brick oven with no more than a laundry basket of wood and no more than twenty (20) minutes of effort to 800 degrees.

When coals develop, push the two 'rail logs' back toward the middle of the oven 
and add two or three small pieces.  The oven is black. 
There's some smoke but the wood catches easily.
Flames are better than smoke.  Too much added wood will slow the firing and create unburned gases.


If you have a removable door, set it up on tiles back from the oven mouth.  This will allow air to flow under it and the flue gases to exit the chimney.  It will also reflect the infrared heat back into the oven and cut down on air exchange.

When the carbon has begun to burn off the dome the oven will be at around 600F.  
At this point I have spent about 15 minutes total on oven management 
and about an armload of wood (standard arm).  
Dry wood will catch immediately.

It goes fast now.  Walk away. Do something else.

Nearly burned, the entire oven is at 800F plus.
If you are making pizza, push the coals to the back,
Sweep the floor and get ready.  Add small sticks to keep flames
for broiling the top of the pizza.  Mangia!  Buono appetito!
 Sometimes it surprises me how easy it is.  Granted, I've done this a good number of times.  Hours after pizza, there's the possibility of bread, then roasts, then beans and/or ribs, until days later, the oven is 200F and ready for the next cycle.  While I'm still relaxed and well fed.

Friday, November 16, 2018

From Pottery Kilns to Brick Ovens

Forty-five years ago I was making stoneware pottery and firing it in a wood-fired kiln to 2381 degrees Fahrenheit (1303 Celsius).

Today I build brick ovens that need not reach temperatures higher than 800 F.  But there is still high temperature material, FIRE and at the end, a wonderful product.


Last weekend, I joined my friend, Willi Singleton in Kempton, PA to fire his noborigama kiln at Pine Creek Pottery.  The twenty-two hour firing brought together Willi's many friends, colleagues, and students for a round-the-clock effort.
Willis starting the fire in a lower chamber

For those unfamiliar with the process of making clay into pottery, Willi's approach is complete.

Willi Singleton
His clay comes from two regions of Pennsylvania and is prepared at his pottery so that it is pliable enough to throw on a potter's wheel.

first fires are stoked in a lower chamber
His glazes are made from wood ashes, corn stalk ashes, and bamboo ash, which all grow around his place.

The wood that fires the kiln is local from sawmills.

Noborigama kilns are built on a hill.  This kiln has four chambers, with the exit ports of each passing to chamber above.  A 25 foot double chimney creates the draft to pull the flames through the chambers.

It is an elemental experience.  The forms, materials and skills are timeless.

Like brick oven building and baking, it is a link to our ancestors.


After a long night, the stoking proceeds to special ports in the pottery chamber itself


a couple of the families
have been helping to fire the kiln
since their children were young


ports are stoppered with clay after the kiln reaches temperature

Wednesday, November 7, 2018

Brick Ovens and CAD (Computer Assisted Design)

Oven projects require planning.  This begins, if feasible, in a site visit with the potential customer.  The conversation often starts with the person's cooking goals and moves through the location, dimensions/capacity, and finally to the style of the oven.

Although my website shows a number of previous oven projects, I have found that every oven can be designed as a perfect fit with the customer, the customer's place and needs.  The result is that a look at the nearly 40 ovens I've built reveals that each one is different: variations on a theme.

A CAD drawing helps the process in a number of ways:

  1. It describes dimensions: footprint, elevation, roof or chimney route, wood box and oven mouth.
  2. It allows for an accurate quote on cost (and comparison to other options)
  3. It prepares me for the quantity of materials needed.
  4. It can be forwarded to the local building inspector and/or architect/contractor so that we are coordinated.
  5. It is the reference point for alterations, if needed, during the project.
  6. And lastly, it may allow the design client to build it him or herself.  For this, I provide a design consultation service.
So, what do these CAD's look like?
I originally had a CAD company set up one for cutting bricks.  I also got separate drawings for each brick in the oven. The master dome looks like this:


I've since found ways of cutting accurate brick chains for any size dome.

Depending on the situation, CAD's took these forms.
Often it is required that the design interface with the exterior or interior space.  As shown below, the spaces also need some planning, whether they are constrained by an existing building or have specific engineering challenges or needs.
Ergonomics, the science of efficient and healthy movement, play into the design.  For instance, managing the preparation of food products going into or coming out of the oven is important.  Counter space around or beside the oven is considered as well as distances from both the sources of the ingredients and the destination of the meal, i.e. the dining space.  A well-sited brick oven becomes both part of the making of food and part of the social scene for the customer.  


Combining a brick oven with a fireplace, when requested, means finding a way to integrate the two while making each function safely .

And entire outdoor kitchen needs extensive planning as it will become a micro-restaurant.  Incorporating aesthetic elements contribute to its purpose as a place of relaxed yet passionate activity.

On rare occasions, a customer hands to me the total responsibility for engineering, placement and aesthetics.  This can be good.  I still use a CAD to estimate both materials and cost.  It is always best to show up prepared.


Saturday, November 3, 2018

Beyond Cob Wood-fired Ovens

bricks fitted over sand mound/form

sand as the form for later brick setting
A long-time friend built a small cob oven a few years ago.  As cob will, it didn't keep the heat for long, developed cracks, and although it was very inexpensive, wouldn't allow his partner to start baking any quantity of bread for sale.
using off-cuts of bricks to create solid mass
Interior inspection and clean-up
Slim bodies only!
As his long-time friend, I gave him some hundreds of stray fire bricks and off-cuts from the precision bricks I'd previous cut for the custom ovens I build for my clients.


The four-cornered dome


Applying the vermiculite and Portland cement insulating layer


The result is a hybrid.  The mouth and flue assembly is from a cast-refractory company, who shall remain unnamed, that I represented early in my oven career.
A slow warm-up to drive the water out of the mortar
We mounded sand as you would if you were covering it in clay and sand, the cob method.
But instead of clay and sand going over the sand, we began mortaring fire brick chunks up and over the mound, filling in behind with refractory mortar.  As with cob ovens, the sand was removed when the dome was finished and set.


We also chose to make the floor rectangular but build a four-cornered dome so that the maximum space would be available for bread baking.  Low cost vermiculite and Portland cement had been cast under the floor bricks and more of this was applied to the exterior.

Subsequently, a box will be built around the oven and the cavity filled with loose vermiculite.  Roof over all.